Last Updated: 02/18/2021 - 17:36

Blog Content Type

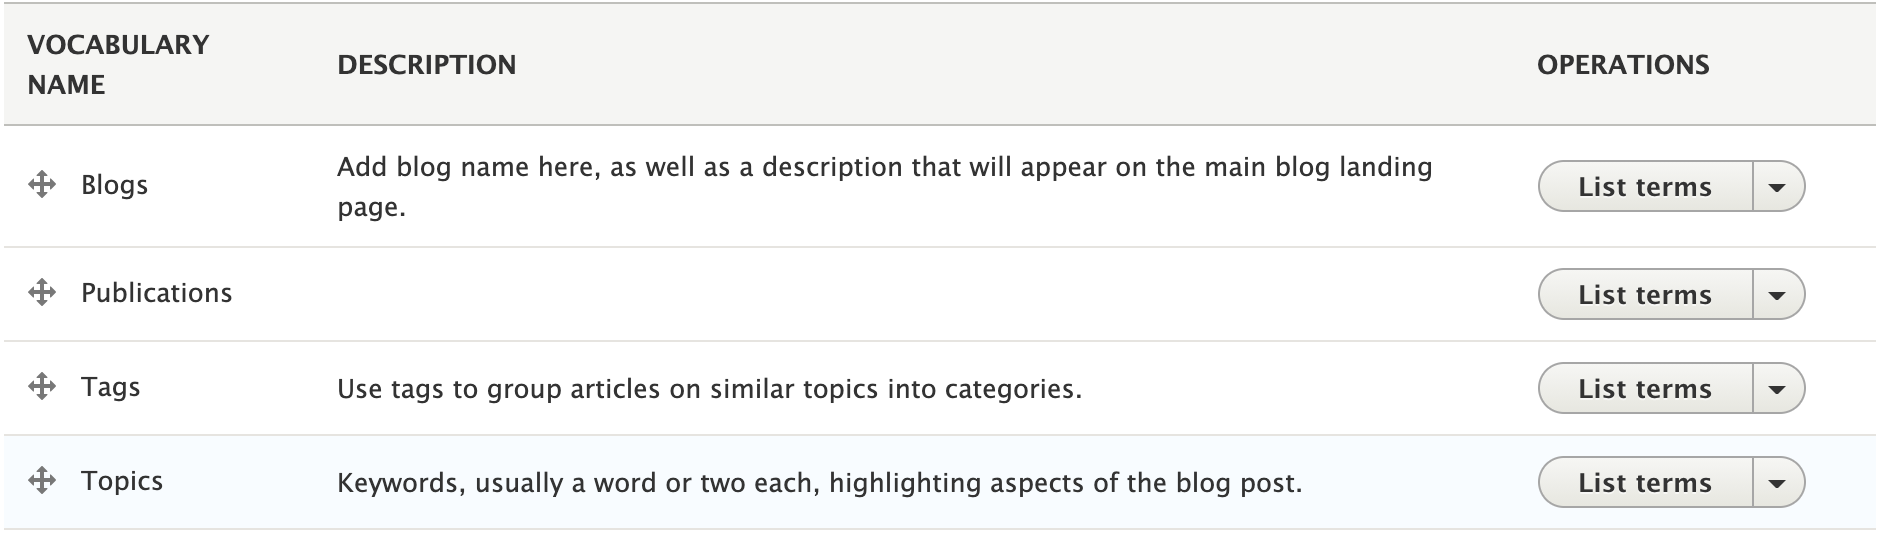
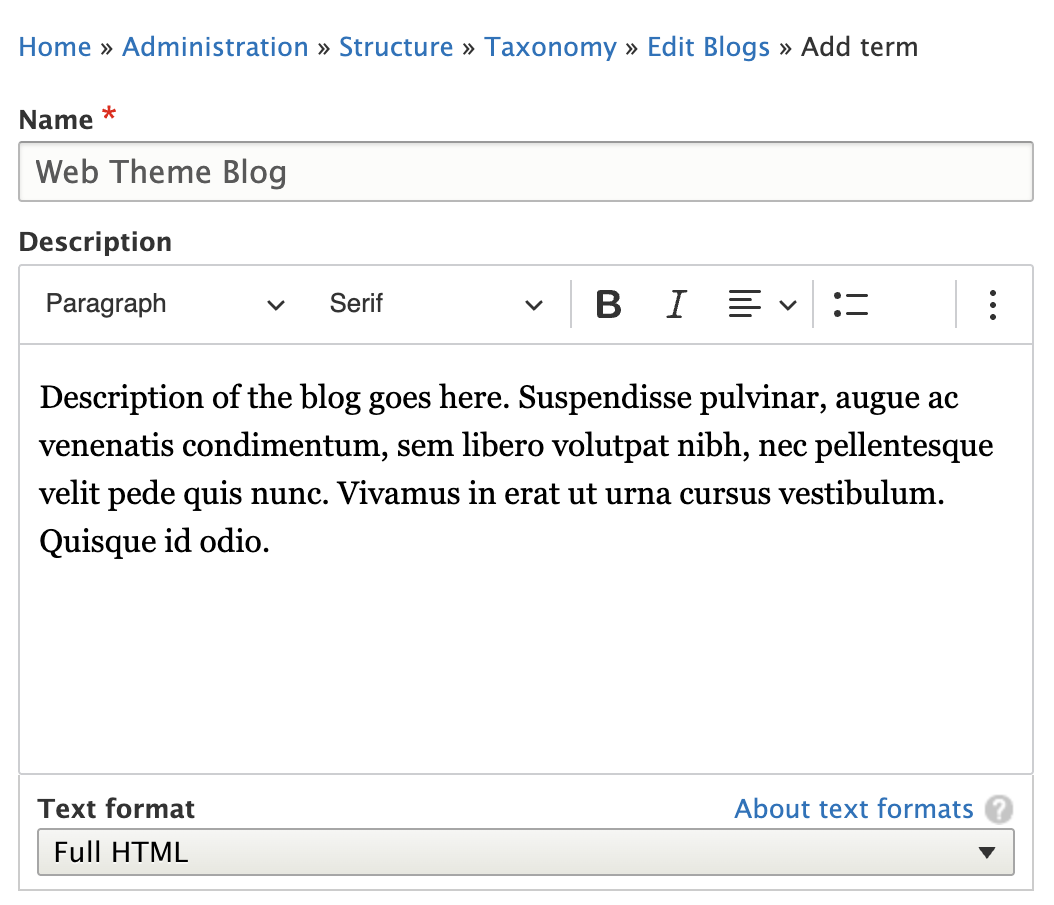
You have the ability to create blogs on your UCSB Web Theme site, which is a way to connect to an audience in an informal style. Select a name, think of some categories to build with, and you're ready for a first blog post. Follow the instructions to properly set up and maintain your blog.

If you cannot locate the blog feature in the module list, please see the end of this document for further instructions.

Step 1: Blog Vocabularies

  • Vocabularies are used to organize blog posts by subject and topics. 
  • Manage vocabularies at Structure>Taxonomy>Blogs(or Topics)


blog sample setup


  • The vocabularies that affect blogs are:
    • Blogs
    • Topics

Initiate the Blog

  • Go to Structure > Taxonomy > Blogs > List Terms > Add Terms and add a blog term with the desired blog title. Add a Description in the description field and it will appear on the main blog landing page. Delete any template Blog terms that already there. 


webtheme creation blog

Step 2: Create Blog Posts

  • Go to Content > Add Content > Blog Post

Create a Title

  • Enter a title for the post. 
  • The title will be displayed on the blog main page and in search results. 
  • The title will also be used to construct the page URL.

Select Blog

  • Select the appropriate blog name in the Blog dropdown field.

Author

  • OPTIONAL field
  • If the author display name is blank, “Staff Writer” will appear

Topics

  • Enter topics, one topic per line, in the Topics field.
  • If the topic already exists in the system, it will pop up as you type. Click the topic to re-use when appropriate.  

Image

  • Upload the image in the Image field and it will appear at the very top of the blog post.
  • Enter alternative text for the image by describing what the image represents
  • If you’d like to re-use an image already on the website, click the “Open File Browser” link to access images stored on the site.
  • Image size recommendations: 600x400 (minimum)

Featured

  • Check the Featured checkbox if the post is to be featured at the top of the blog main page.
  • More than one ‘Featured Post’ can be checked, but only the first one selected will sit at the very top and look different. It is recommended to only have one at a time.

Summary

  • The Summary section is located above the Body field label.  Remove or replace the “nbsp;” with a brief summary of the post.
  • This summary will appear both on the landing page (next to the image) as well as inside the grey bar at the top of the blog post. 
  • If a summary is not provided, the landing page will display the first 600 characters. 

Extras

  • The lead, or opening paragraph, is set to display in a larger font size and increased line height.  With so many sources of information – newspapers, magazines, TV, radio and the internet – audiences simply are not willing to read beyond the first paragraph (and even sentence) of a story unless it grabs their interest. A good lead does just that.

Step 3: Add Blog(s) to Main Menu

  • Go to Structure > Menus > Main Navigation: Edit Menu
  • If “Blog” menu item does not exist, add it to the top level by selecting ‘add link’
  • The url for this must be in the pattern of /blog/myblogname (replace myblogname)
  • To find the url of your blog name, look at the url of a blog post.  It will be in the pattern of /blog/my-blog-name/blog-article-name


If you already have a Web Theme and do not see the Blog feature

The modules for Blog are turned off. To enable the modules:

  • Backup your site environment in Pantheon.
  • Extend > Easy Breadcrumb > Install
  • Extend > Blog > Install